Arduboy TV on ESP32 with PS3 Remote Control
Table of Contents
Synopsis
A simple games console for some fun, with some cheap components and minimal experience necessary to get going to make and play games.
The Goal
I set out to make a easy minimal effort Arduboy game console. The design goals were
- Cheap and simple
- TV output
- Nice controls
- Assortment of fun games to play
I am quite comfortable working with ESP32 and Arduboy code now and thought it would be a fun project to push myself to learn a few new things.
Nailing the goals one by one
Cheap and Simple
KISS - Keep it simple stupid.
Pretty much the only big product to purchase is this
http://www.lilygo.cn/prod_view.aspx?TypeId=50033&Id=1126&FId=t3:50033:3
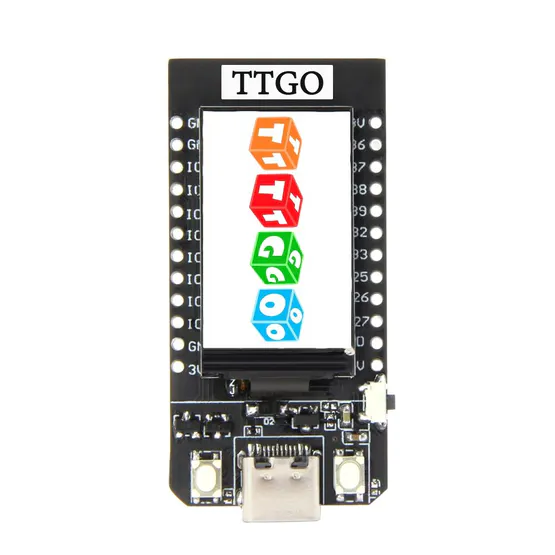
The TTGO T-Display ESP32, this board was actually cheaper than a lot of boards without a display at the time I bought it, but almost any ESP32 board will do.
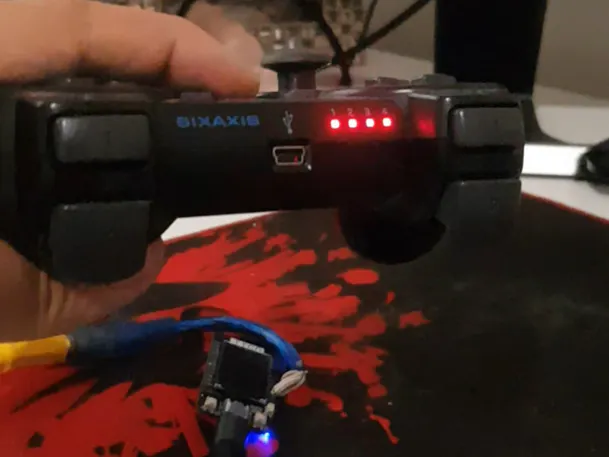
I have kept building controls over and over and this time I was hoping I could leverage some of the extra hardware in the ESP32 for this purpose. I chose a PS3 controller, any wireless generic PS3 controller should be perfect.
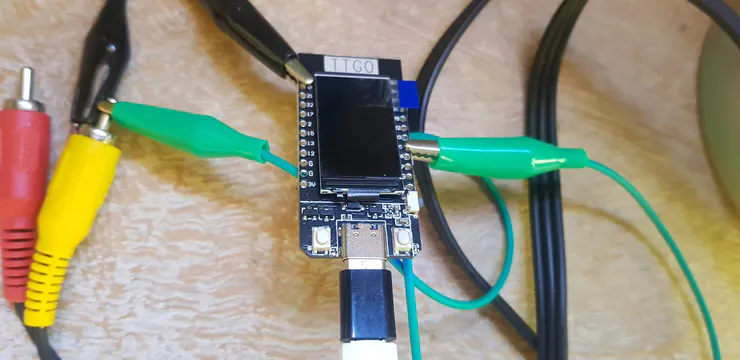
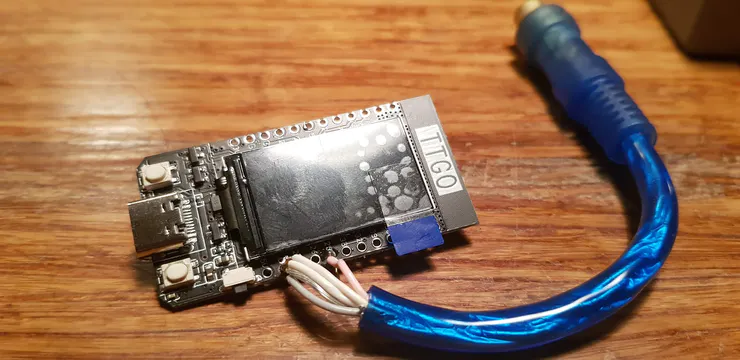
You will need some RCA jacks as well, I went with the female header so that I could quickly and easily run back and forth between the TV and my PC and a male to male extension cable to leave the back plugged into the TV as well… Eventually I did get a RCA to HDMI convertor and hooked it up to my second monitor, I am quite happy with the device and less turn around time between flashing and testing.
TV Output
TV output was the first and foremost thing I really wanted to learn a bit more about. There was an awesome video by Bitluni on the subject

https://bitluni.net/esp32-composite-video
And his code here
https://github.com/bitluni/ESP32CompositeVideo
I got this up and running and that was really cool to see some actual video signals I was sending from a bare ESP32 to the TV.
There were a few issues with the unmodified code, it is actually meant for an ESP32 with PSRAM, which augments the 520kb normally available with up to another 8mb!
The issue was that doing colour uses a lot of space and with the library and the way it works, it has VERY tight timing requirements, so you actually use a double buffer, which means while you’re drawing the one buffer (screen), you work on updating the other buffer. At the point where you complete rendering to the one buffer, you swap it out and then display that one, and start drawing to the alternate one. This allows you to continuously render the one buffer to the TV while the game is working on the next frame.
I got around the size limit I was facing by moving from colour to black and white, which made the buffer 8 times smaller from a byte to a bit… so we’re back in the game :)
Another interesting problem with generating a TV signal is that it requires very tight timing constraints being met, and with the ESP32 having 2 cores, I got around this issue by mentally dedicating one of the cores to the TV signal.
I could have gone another route, and got an ESP32 with the PSRAM, most camera modules have them as they chew up way more than 520kb quite often, though referring back to my original Cheap and Easy goal the ‘bare’ ESP32 without the extra ram is a lot easier to get hold of.
Nice Controls
The choice I originally made was to go Bluetooth, it gets a few goals of mine in place, it’s good controls, the hardware is built into the ESP32 (though some software hackery is needed) and since we’re doing TV output, it’ll give us some range to hit the couch while we play.
I happen to have a derelict PS3 and 2 controllers for it, so after messing around with some original Bluetooth peripherals I decided to see about using these.
The PS3 controller is a fascinating case of almost there, technically it uses Bluetooth but has a custom pairing process via the serial numbers.
Using this library https://github.com/jvpernis/esp32-ps3
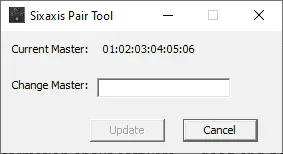
I hooked up my PS3 controller to my PC and set it’s serial number using the SixAxisPair tool to 01:02:03:04:05:06 (very original I know!)
I got it from here which this website, which seems legit … https://sixaxispairtool.en.lo4d.com/windows
One thing to be aware of when kicking off an ESP32 project with Wifi and Bluetooth is that the libraries are huge! You blast about 1Mb of your ROM just to get the BT and Wifi stack, I believe there are lighter ones available, but not that I could get working with Arduino.
With this done I was up and away with input and output working!
Now where are my games!
Assortment of games to play
The Arduboy has brought me a world of fun up to this point already, from it being the first real hardware I put on a breadboard and then soldered onto a protoboard and building my own ESP32 version and finally doing a TV out version now. I’m very happy with the amount of fun I’ve had an in and around this eco-system. I even built a game I’m quite proud of Game Plug ArduRacer https://community.arduboy.com/t/arduracer-a-trackmania-type-time-trial-game/8850 , it has smooth scrolling, a zoom in start line and 10 levels as features!

An early console prototype (wrong chip, but I promise I had a pretty similar Arduino Pro Micro one with buttons).
The actual process of getting it up and running was quite fun.
Originally I tried with Mr Blinky’s library
https://github.com/MrBlinky/Arduboy-homemade-package
It’s great and does the trick for a lot of different types of Arduboy’s on different screens and different pin out for Arduino’s. After a bunch of false starts, I found the ESP8266 conversion for ESPBoy https://www.espboy.com/
Once I grabbed this, the first thing I do is always get it up and running on the hardware it’s built for, so I grabbed an ESP8266, a compatible screen and breadboard it all and worked on it until I got it up and running (and then played some games for a while)
With this done, the next steps was to replace the processor, there were a lot of changes, but mostly removing and changing libraries. I’ll list some highlights
- PROGMEM isn’t a thing on ESP32, remove references
- avr/pgmspace.h has moved to pgmspace.h on ESP32
- EEPROM isn’t great and has to be worked
- Tones didn’t work, had to rework the code and it’s still a bit hacky
- Changed the controls to use the PS3 controller
- Change the output code quite substantially to be threaded and output to the TV
- Because of needing threading, I had to modify the code of every game!
PROGMEM - This was kinda easy, all you need to do is #define PROGMEM to mean nothing and et viola, done

avr/pgmspace.h - I was a bit lazy and did a full search and replace in Visual Studio Code over the whole folder, this took care of this quick quick
Tones - I wrote some hacky code that works great for Catacombs of the Damned, which I love! Some other games struggle with it unfortunately… I should look into it more later
EEPROM - I got this working well enough for during the game to have it stored, but in reality it needs a full blown implementation, I would love it know which game is running and store and EEPROM file on the SPIFFS partition, which is more like a file system and allows files, possibly a format which matched the game name and would store that particular games EEPROM in a files on the SPIFFS so it would never get overwritten. TBC
PS3 Controller hookup - The PS3 library actually has a notify check which runs every so often and I just hooked this to store it’s values in some global variables then I was able to use this in the Arduboy2Core::buttonsState procedure to set the values.
TV Output - The Arduboy has it’s own framebuffer and I would have ideally have used this to avoid code duplication and copying, but it has a slightly weird format of horizontal stripes. The buffer mimics the way you write to the screen which is a couple horizontal pixels at a time, and this made it quite hard to work with for my TV output code, so I have a process that I put into Arduboy output code and instead of outputing to the screens, it prepares the buffers and handles the swapping of buffers with a lock. There is a thread running the whole time just doing the TV output using the currently set output buffer, which will pick up the changes whenever they’re ready.
Modify the code of every game - This was actually quite entertaining, since it’s meant to be source compatible I wanted to find a way to modify every Arduboy game, I worked through quite a few solutions. But let me setup the premise first.
I needed to add the initialization code for the threading, the TV output code is very time sensitive for the NTSC signal it’s generating, so I wanted that to have a whole core to itself. The Wifi and Bluetooth code also runs by default on the one core which is in use by default. This proved problematic for the TV output, so I wanted it on a different core.
First try - Modify the games manually this was a pain to do and wasn’t maintainable or scalable for all the games.
Second try - Replace the main ino file with my own, while renaming the ino to mytvgame.cpp or some such, I was able to get away with this with one or two games, but then had a few problems for a few reasons. Ino files are like a global namespace and functions can be defined in any order you like (as if you specified them in an imported header) but when I programatically generated the header files I start encountering many more errors. Here’s the single source file which actually was able to make headers from my Arduino INO file https://fossil-scm.org/home/doc/trunk/src/makeheaders.html once they were copied into CPP files.
Third try - Actually all I need is to rename the setup() and loop() to something else and make my own startup and loop methods which call those!
I have been having a lot of fun with Python lately and decided to script it out in there. First things first, go through all the GAMES directories looking for a.ino file which matches the folder name (it’s an Arduino IDE restriction I’ve never understood, but thanks!)
Once you’ve found the files, take a backup (always take a backup!). Then a copy to a file I’m willing to modify, I run a few changes
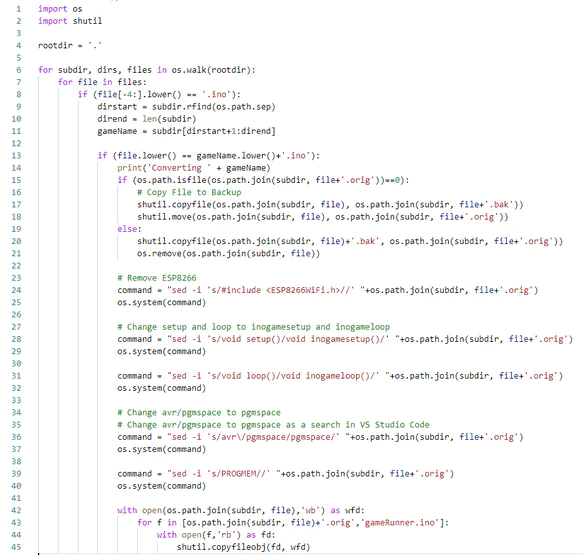
In the end once it’s done all the run of the mill changes, it creates a new ino file with my new setup and loop which calls the renamed game setup and loop methods once it’s done it’s stuff
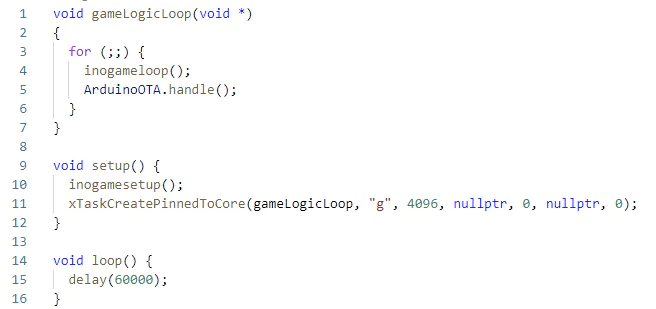
My setup runs the game setup code and sets up the thread for the game logic loop.
I could do almost anything I wanted in here, currently it’s just trying to do the Over The Air updates, but a flash menu could possibly be added later and if we had a SD card, you could have multiple games on the device
You will see the loop is just a delay method. It doesn’t need to do anything the gameLogicLoop thread takes care of running the original loop code.
A nice feature in this was to actually make it runnable multiple (kinda idempotent) so everytime you run it, it will modify the original files and not the already changed ones, this helped a lot with quick iterations on it.
Where to from here
You can take a look at all of my code if you’re interested in poking around
https://github.com/tonym128/ESP32_Arduboy
This project is all currently under the tvout branch
I’ve had this running on a BSides Cape Town 2019 Badge, where I detailed the software for the badge project itself here.
https://ttech.mamacos.media/2019/12/15/making-a-badge.html
An ESP32 E-Paper display
Dark and Under on the E-Paper Board and the BSides Cape Town 2019 Badge
And now with the TV output with PS3 controller as what I believe is the simplest and quickest way to get going with this and have some fun.
I hope you found some interesting bits in this journey with me and if you would like to chat to anything about this, give me a shout, I’ll be happy to engage.
Until then I’ll be playing some Catacombs of the Damned.